Many counterfeit chips are being used in military, aerospace, industrial and consumer products, and when these devices fail during a critical mission, it can be a matter of life and death or significant loss of property.
Our quality system effectively prevents counterfeit electronic components from entering our supply chain.
Visual Inspection
External visual inspection is a process of verifying the attributes of parts such as components condition, part markings, evidence of a secondary coating, lead conditions, dimensions and surface quality. QC engineer over 10+years working experience.In this way, more than 99% of the fake electronic components can be checked out, and if the authenticity cannot be confirmed, we will conduct tests through third-party authoritative laboratories.

Value-added services:
Chemical Etch or Decap

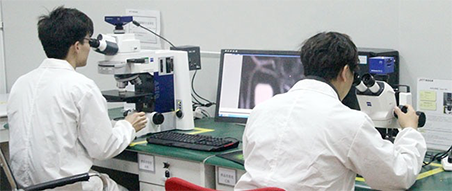
Decapsulation is to chemically etch a device until the die is exposed. This is done with a Jet Etch system from Nisene Technology Group. Once exposed a device may be confirmed by reading the internal die markings under a microscope. In some events a die marking will correlate with a devices external markings.
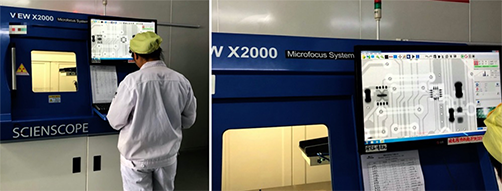
X-Ray Analysis

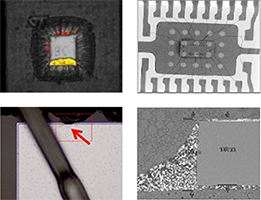
X-ray inspection is a non-destructive test. It is a process to verify the bond wire connections, die size comparison and ESD damaged. Our typical sample lot check is 5 samples or 100% depending customer requirement. Counterfeit devices can be determined by comparing the structure of the die to a known good device. Part should be identical from bond wire location to die size.
XRF

XRF can be carried out on parts to evaluate the material composition of the terminations and the molding compound in order to detect the presence or absence of Pb and other discrepancies with an authentic part. This is a non-destructive test. A complete graph will be providing with a list of substances found.
Decapsulation

A destructive test that removes the insulation material of the component to reveal the die. The die is then analyzed for markings and architecture to determine traceability and authenticity of the device. Magnification power of up to 1,000x is necessary to identify die markings and surface anamolies.
Our decapsulation report includes analysis of the die markings and topography to clarify what is verified versus still unverified about a device. We do not only send images and leave the analysis up to you.
Solderability Testing

This is not a counterfeit detection method as oxidation occurs naturally; however, it is a significant issue for functionality and is particularly prevalent in hot, humid climates such as Southeast Asia and the southern states in North America. The joint standard J-STD-002 defines the test methods and accept/reject criteria for thru-hole, surface mount, and BGA devices. For non-BGA surface mount devices, the dip-and-look is employed and the “ceramic plate test” for BGA devices has recently been incorporate into our suite of services. Devices that are delivered in inappropriate packaging, acceptable packaging but are over one year old, or display contamination on the pins are recommended for solderability testing.
Destructive Physical Analysis(DPA)

Destructive Physical Analysis (Destructive Physical Analysis) referred to as the DPA, is in order to verify the components in the design, structure, material and manufacturing quality whether meet the requirements of the intended use or relevant specification, the components of the production batch sampling, non-destructive and Destructive Analysis samples of components during the process of a series of test and Analysis. DPA analysis technology can identify potential material, process and other defects in the device in advance. The time of failure caused by these defects is uncertain, but the consequences are serious.
The purpose of the DPA
For the purpose of preventing failure, prevent the components with obvious or potential defects from being used on the machine;
Identify deviations and process defects in the design and manufacturing of components;
Evaluate and verify the quality of components from supplier;
Put forward batch processing opinions and improvement measures.
Scope of DPA application
Areas with high reliability requirements, such as aviation, aerospace, communications, medical devices, automotive electronics; Components listed as key components or important parts in electronic products; Components used on a large scale.
DPA test item

External visual inspection
Bonding intensity
X-ray detection
Ultrasonic scanning seal test to open
Quality is paramount to Briew Co.,Ltd. We are continually improving our working practices and processes so that we understand and meet our clients' requirements, and ultimately exceed those requirements.
Our quality management system includes:
1.New and original 100% only;
2.No fake promises;
3.RMA procedures
4.Vendor Management
5.Value-added Services+(Lab Test)